This is the second half of the tutorial for Mary’s Weekend Coin Quilt. Please pardon my dark photos. I took these pics in January, then failed to finish the binding on the quilt until recently. This quilt really does come together quickly, and fast enough for a weekend…. you just have to not be a procrastinator like me 🙂
Add the Sashing to the Coin Sets:
1. Measure the length of Column 1. You may need a helper to hold the opposite end. It needs to be taut when measuring.
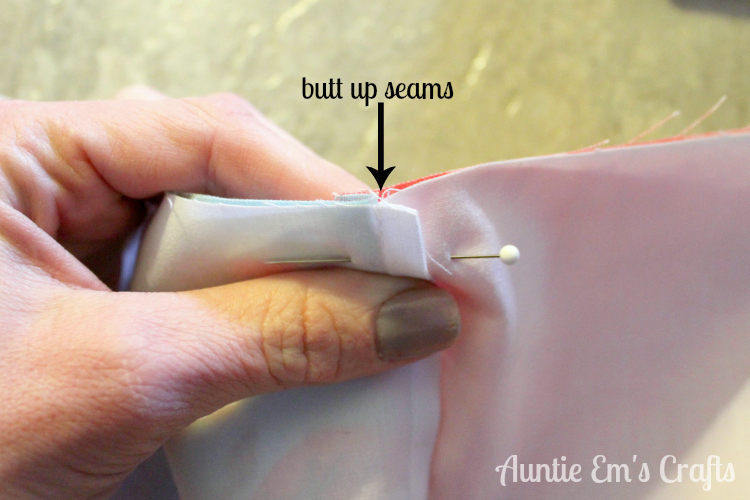
2. Set a sashing piece face down on top of Column 1. The seam of the sashing will sit flat with the seam between the 8th and 9th coin. If the seams don’t sit flat, turn the sashing piece around. Place a straight pin where the seams join.
3. Divide the length of Column 1 in half. From the center of the seam, measure that distance on the sashing.
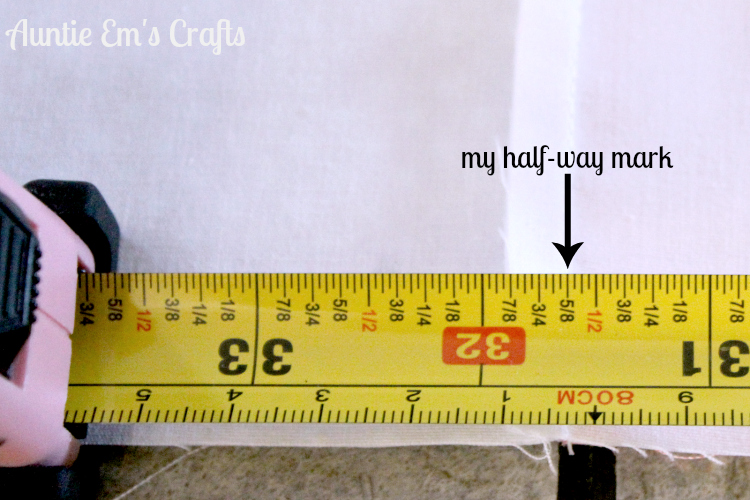
Draw a line there with a water soluble pen. Draw an equidistant line on the other end of the sashing.
4 .Pin the top and bottom of Column 1 to the sashing at the lines you drew. Place pins every few inches, at all of the seams.
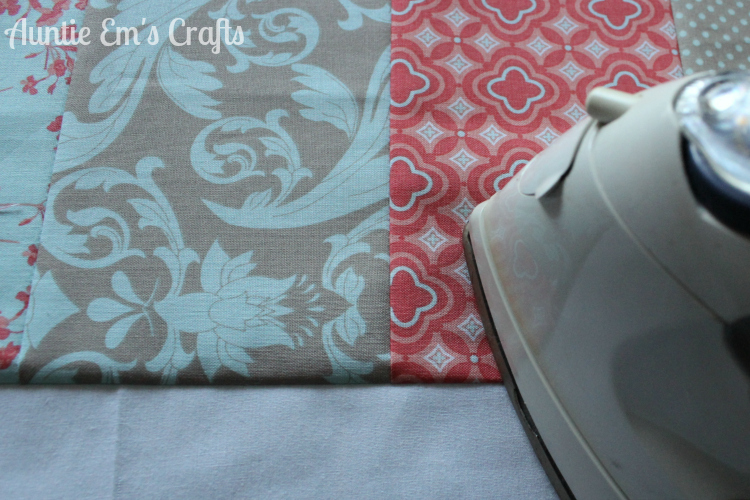
5. Sew the sashing to the Column. Iron the seam open towards the coins.
6. Using the Shape Cut, trim the excess sashing evenly with the top and bottom of the Column.

7. Repeat steps 2-6 for the remaining three Columns.
8. Sew on the final vertical sashing to the other side of Column 4. 
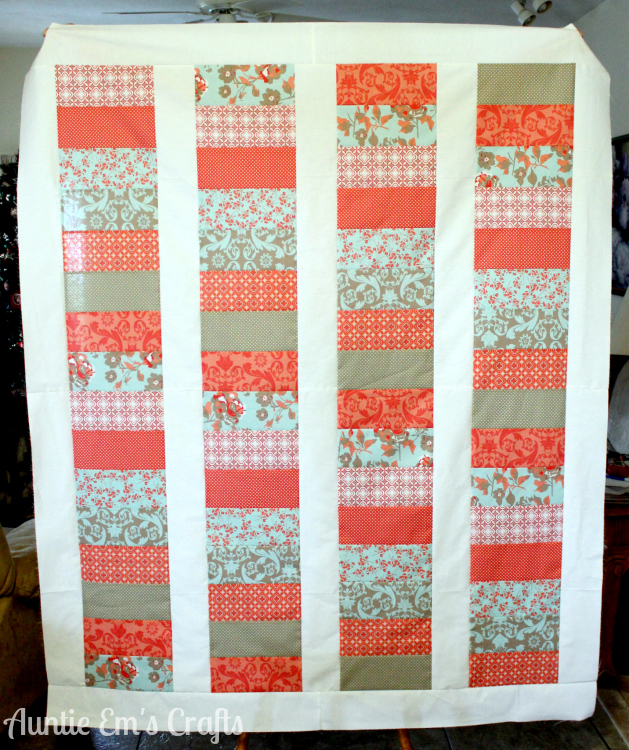
9. Place Column 2 on top of Column 1, right sides together. Pin every few inches. Sew the Columns together. Iron the seams towards the coins. Repeat this step for Columns 3 and 4.

10. From the center of the Columns, measure the width from sash to sash. Again, you may need a helper to get an accurate measurement.
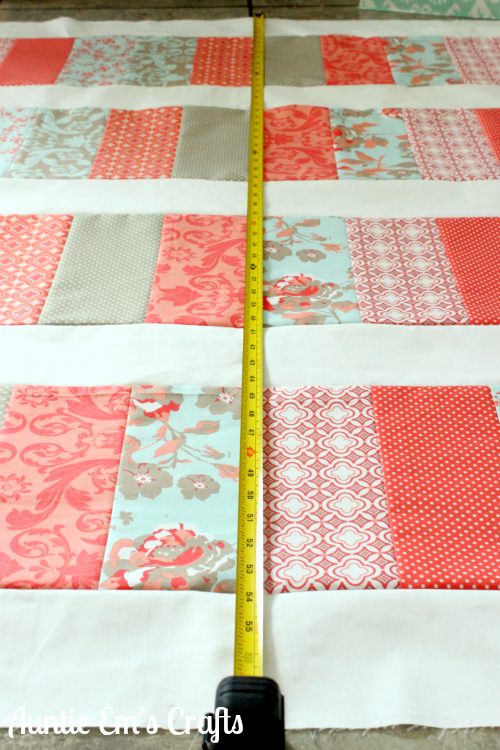
11. Divide the width in half. From the center of your next sashing set, measure that distance and draw a line. Repeat for the other end of the sashing.
12. Pin the sashing at the top of the columns at the lines you drew. Place pins every few inches.
13. Sew the sashing to the top. Iron seams open towards the coins.
14. Repeat steps 11-13 to add the the final sash to the bottom of the columns.
Create the backing:
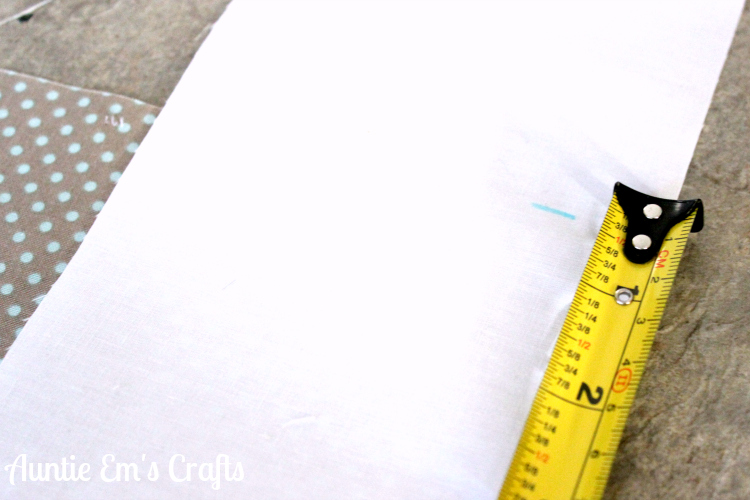
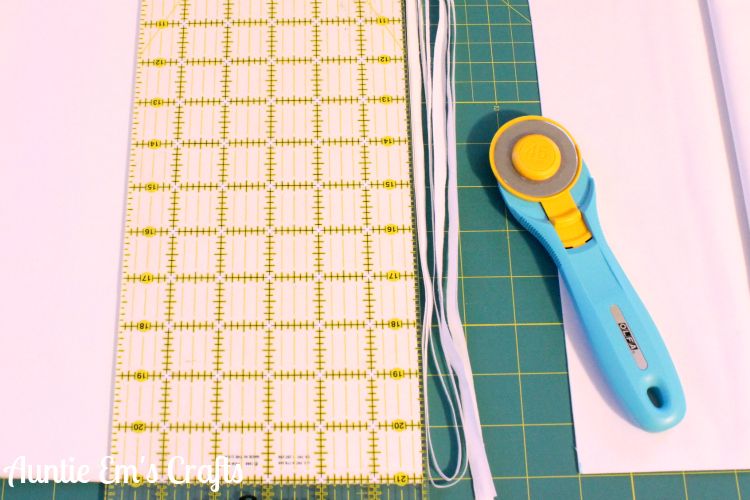
1. Unfold the backing fabric and use a tape measure to find 64″. Draw a mark onto the fabric with a water soluble pen.
2. Use the 6×24″ ruler to cut the backing fabric 64″ wide.
3. Repeat the last two steps to make another 64″ wide piece.
4. Cut approx 1/2″ off the bottom edge of the fabric to remove the selvages.
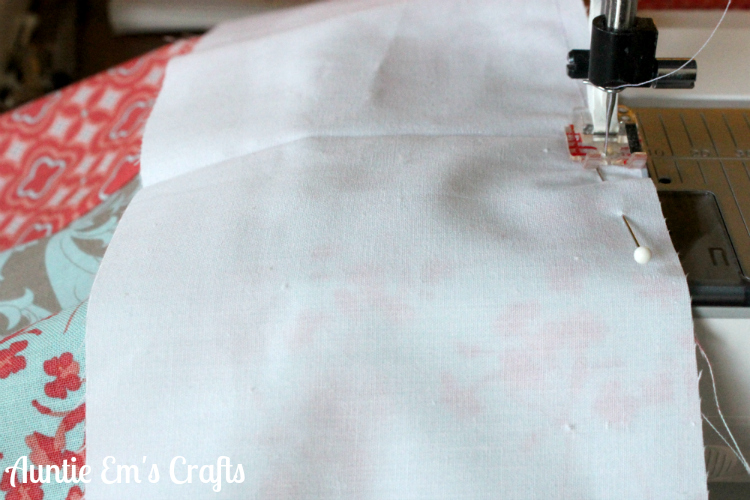
5. Sew the two pieces together using a 1/4″ seam allowance. Iron the seam open.
Finishing the Quilt:
I prefer sending my quilts off to my friend at Quilting Together With Mindy, but sometimes I have to brave finishing them myself 🙂
Place your quilt backing face down on the floor. Tape edges down so that backing is taut. Use basting spray to join the batting to the backing. Smooth out the batting. Center the quilt top on the batting. Fold one half of the quilt top up. Spray the basting spray and place the quilt top back down. Smooth out the top. Repeat with the other side of the quilt top.
Quilt as desired using a walking foot. I chose to straight line quilt every inch on the sashing. I like the look of the overlapping lines in the four corners.
If you need assistance with creating binding strips, sewing the strips together, adding it to the quilt, or machine or hand-sewing the binding on, I have written a full tutorial on Simply Notable. There are many pictures to help you with each step.
![]()
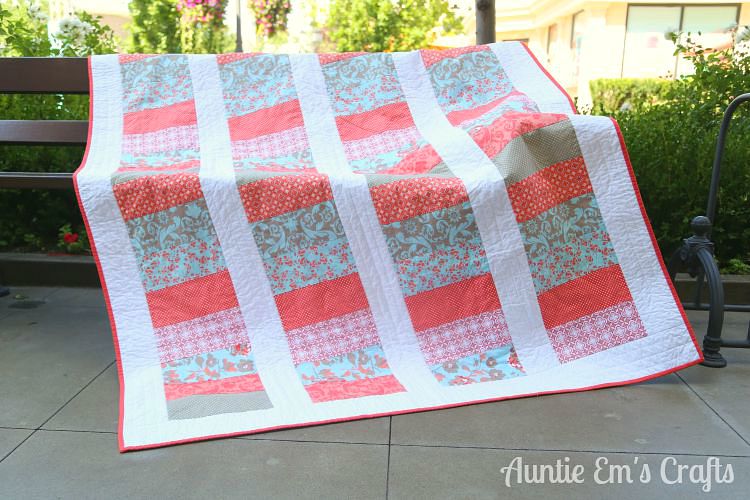
This quilt top comes together quickly. It makes a great gift for friends, family members, and obviously yourself! This is an easy project for beginner quilters to tackle, but is fun for quilters of all experience levels. With your leftover fabric and batting, you can make a Reversible Table Runner or Modern Quilted Potholders to match your quilt!
Please share photos of your finished quilt on Instagram #weekendcoinquilt and tag AuntieEmsCrafts!
![]()
Hi there, I want to make this quilt and appreciate your gift of the instructions. I will come back and send you a picture of the quilt I make. Take care, have a lovely day and may God bless you,
That would be great. I’d love to see!