This post contains affiliate links, which means I am compensated if you make a purchase using this link. Thank you for supporting my blog!
Sure bibs are great for teething babies but even better is a bib plus binky strap in one! The binky connects directly to the bottom of the bib so that you don’t have to worry about it hitting the floor when they spit it out. Genius, right! I have been asked half a dozen times on Facebook if I make these, so I guess the answer is I do now. And you can too, in about 30 minutes with this binky bib pattern and tutorial.
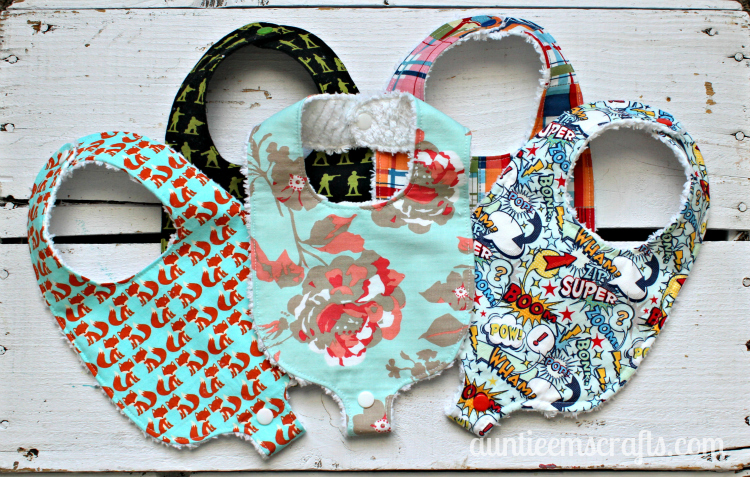
(Of course, if you want to make a bib and binky strap separately, I have made tutorials for those too.)
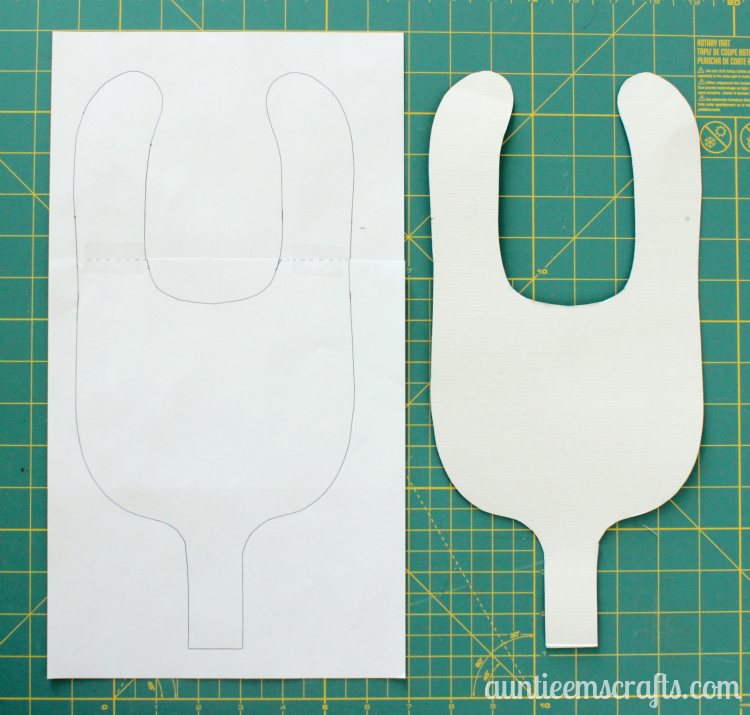
This pattern is not very different from the newborn bib in my Basic Bib Tutorial. The difference is you will add a flap with snaps at the bottom of the bib. Download the new template here Binky Bib Pattern. Once the pieces are taped together and cut out, trace it onto some chipboard for a sturdier pattern. I used a gift box from Christmas, but a cereal box or stencil plastic would work great also.
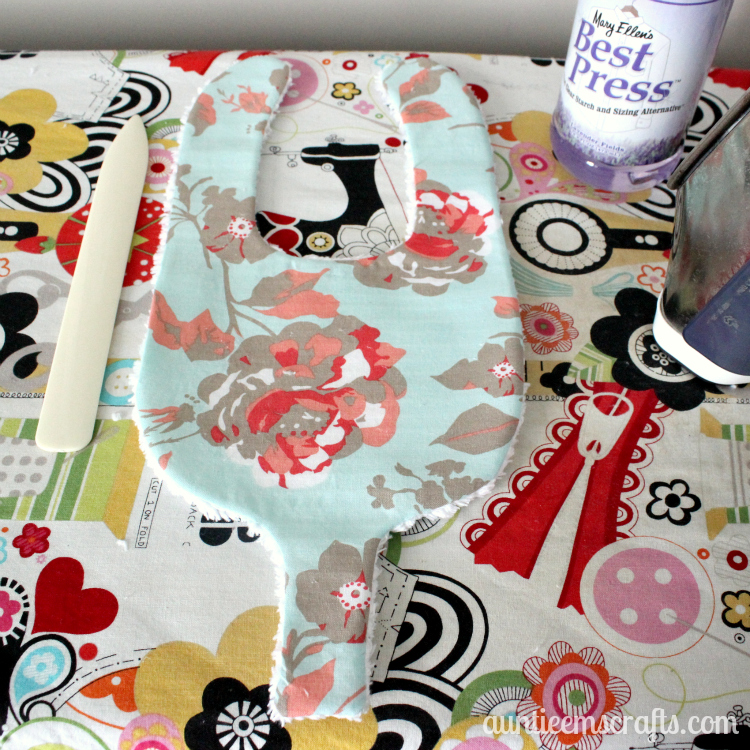
Follow steps 1-15 from the Basic Bib Tutorial. There are many photos and clear instructions at that link. Of course, if you have any questions you can leave a comment below.
If you use a thick material for the backing, such as minky or chenille, I suggest you use a walking foot to help guide the fabrics evenly. Both fabrics should be cut 14.5″ tall x 7.5″ wide.
Here is how the bib will look after step 9.
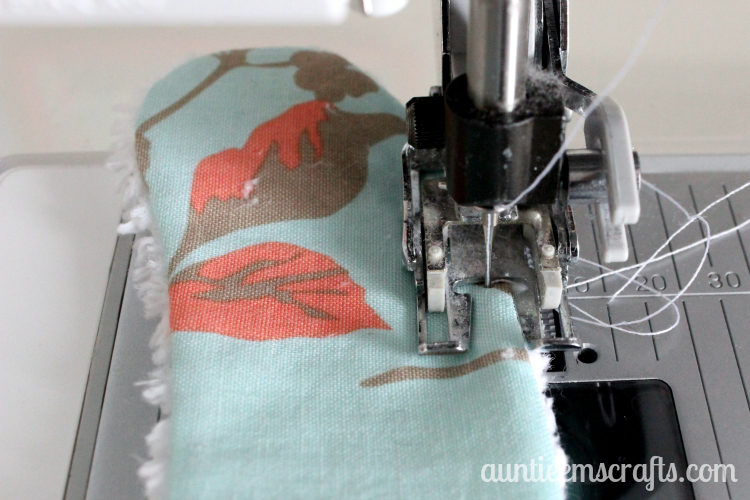
At step 10, you will top stitch near the edge. This will close the gap you left earlier without the need for hand stitching. I like to use the edge of my walking foot along the edge of the bib and move my needle over as desired.
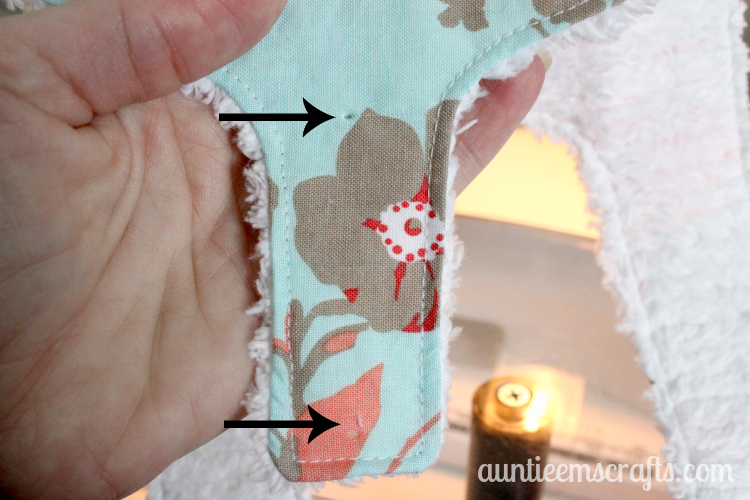
During step 12, you use the shank tool from the Babyville Boutique Snap Pliers to poke holes for the snaps. This time you will make a second pair of holes on the flap. Add a male and female snap set here. The flap should fold underneath the bib when fastened.
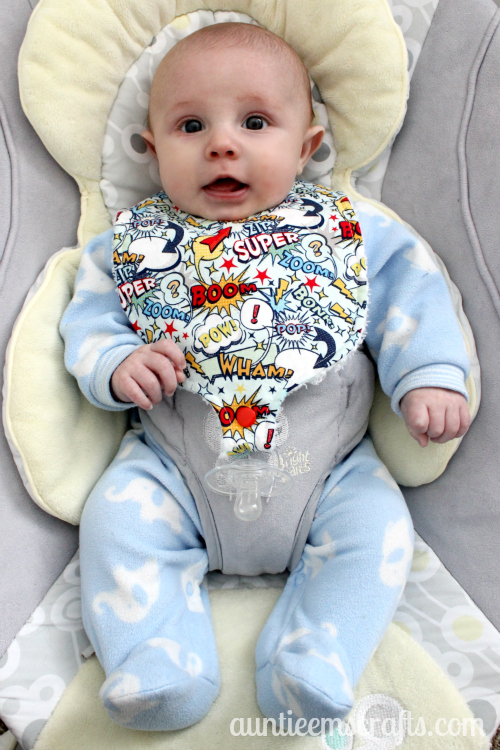
Here is my little guy Lincoln at 10 weeks with his binky bib.

Available binky bibs will be listed soon in my Etsy store or by clicking on the Shop tab on this site.
![]()
Would like to know the finished size of the newborn binky bib…including the unsnapped tab and from neck edge (chin) to the beginning of the tab extension. Allowing for the seam allowance, the printed pattern seems small.
Hi Brenda. From the chin to the beginning of the tab should be approx 5.25″.
Do I use an interfacing
No, if you use a chenille or minky for the backing you do not need an interfacing or liner. If you use a flannel or cotton on the back you will probably want to use a liner such as flannel.
what fabric works the best for these?
Barb, I use medium weight cotton and chenille. I have also tried flannel for the backing and that works fine too.
If I use PUL fabric, do I need to put a lining in the middle or do I use PUL for the back and a cotton for the front? Thanks for a cute pattern!
I am not sure, as I have never sewn with PUL. I don’t think you would need a liner with it. If it stretches, you might want to use a walking foot.
Use PUL all the time. No need for a liner type of fabric.
Bibs are lightweight – test protective. Make sure that once the snaps are put in, the bibs are put into dryer for about 20 minutes to seal the snap holes and the stitch line.
Cute and practical idea.!
If I use flannel w is that sturdy enough for with 4 layers
Yes, it would be but two or three layers would be plenty. I made some with cotton front, flannel liner, and flannel backing and those were good.
Thank you for the pattern ! I wish I had that back when my daughter was a baby.
I just put the binkie on a a double stringed yarn necklace that way I could either
Wash the yarn or make a new one. We never lost another after I came up with that idea. My daughter boundaries me a beautiful singer sewing machine you can sew like 300 different design’s , it has a screen. I had to read the manual just to thread the needle. It also has a double needle if I need that then I have 12. Different feet I am a bit intimated with it. But gosh I sewed all the while my daughter was in school! That’s been a good long while since. Anyways thank you for taken the time to read me going on.
Instead of cutting out extra material just for the bottom tab, I would simply add a thin tab made from the cut out portions of the bib and insert it at the bottom between the lining and top material. Further, the wide cutout portion from the neck area could be added as a pocket in front if the bib to pick up food crumbs and droppings. This pocket could be given a contrast piping for added beauty.
Great ideas! Thanks for sharing!
I would use Velcro rather than a snap as a baby could chew on the snap. Definite choking hazard.
Velcro is certainly an option. When installed properly, the snaps are difficult to remove, even with a set of pliers. No baby should be able to remove it with their teeth.
what size do these wonderful bibs fit????
These will fit well over a year old.
I tried to remove with my teeth. No way. And please dont use as a teehing item.
I hate velcro cause it sticks to everything in the wash and eventually wears out…a properly installed KAM snap is near impossible to remove (even with pliers it takes a huge amount of pressure to pop those things off…and yes, I’ve installed a few the wrong way and cursed a lot to remove them haha)…they are definitely my snap of choice on baby items
what would you do for the end if you wanted to make this for the soothie binkies instead of the ones in the picture?
Hi Nicole. In that case, I would use this tutorial instead, http://52.43.193.142/basic-bib-tutorial/. Use the small size pattern. I would either fold 6″ of ribbon or round elastic and sew it between the layers at the bottom of the bib.
Another option would be to tie ribbon to the soothie and attach it to the binky bib.
thank you for your fast response 🙂
Do you think flannel front with terry cloth backing would be ok? Should I use a liner? What about cotton front and terry cloth back?
I think those would both be okay. If you are worried, go ahead and add the liner. I don’t think it would be necessary though.
I’ve just found this via SewCanShe.com I would love to make one for my firends baby, especially in fabric for baby’s baptism on Sunday. I’ve never used snaps before and don’t own a machine (also it would be an expensive purhase for making 1 or 2 bibs). Do any of your tutorials show an option for velcro fastenings?
Thank you so much for sharing your knowledge and pattern. This is definitely on my TO DO list.
This is such a USEFUL pattern! Thank you so much!!!
How Sweet!! Could I have permission to make these with my quilt guild as a service project?
Sure
Is it easy to buy a walking foot? its my first time to see it. thanks
Yes, the company that made your sewing machine should offer one. They are around $100 so it may not be in your budget. Your machine might have a way to loosen the pressure on the presser foot or adjust to what type of material is being sewn (thicker versus medium weight cotton). If that’s the case give that a shot before making the investment.
thank you for your quick and professional reply
Love this bib. Thank you for this cute pattern and tutorial. I made one this morning but have not put the snaps on yet. Can you confirm if this is the correct size? Mine is almost 7″ x almost 10″ un snapped. I checked to be sure fit to page or other formatting wasn’t selected when I printed. I saw one someone else made and it is longer. Perhaps I did something wrong. Thanks so much.
Hi there. The bib should be about 6.75″ x 14″ when finished.
Thank you so much. I measures wrong originally. That’s about the size my bib turned out. I appreciate the prompt response.
Great idea! Can’t wait to make it for my “great grandson” .
Where do you get white plush fabric you used on this bib? I can only find ivory.
Hi Sandi,
I sell the chenille in my etsy store: https://www.etsy.com/listing/242162840/white-terry-chenille-fabric-58-wide-10?ref=shop_home_active_1
I have it in white and black.
Is a seam allowance included in the pattern? What is the seam allowance when sewing?
Thank you.
Jill, there is no seam allowance included. You will sew directly on the line when you trace the pattern onto the wrong side of your fabric.
Thanks so much for this pattern and tutorial! I’ve printed it but it only gives one size. I see in the comments for the correct finished measurements but is there another size that I can print also? So, would you say this is newborn to one year?
There is only one size for my binky bib pattern. There is a larger bib pattern in my basic bib tutorial but it does not include the tab at the bottom. The binky bib will fit to approx one year, depending on the size of the baby.
Just saw this and want to make some bibs for my new great grandson and wondered What size snaps did you use.thank you for the tutorial
Barbara, I used size 20 Babyville snaps found here. http://amzn.to/2kRo4VJ I have also used KAM snaps and they work just fine too.
Emily, thank you for the tutorial, pattern and tips! I have one more question, can you tell me where you found the fabric in this picture?http://52.43.193.142/wp-content/uploads/2016/01/IMG_3674-1.jpg
I’m sorry, the plaid fabric in picture in link?
Sure. The foxes came from Joann last year. I don’t think it is sold anymore. The floral is Kensington, then Super Hero Words. Both are Riley Blake and are discontinued. In the back row is Military Max by Riley Blake (found in my etsy store). The Michael Miller Shore Thing Plaid.
Thank you so much,;)
Any tips on how to make the pattern bigger for bigger babies/toddlers? Beginner sewer here. 🙂 Appreciate the help!
Well, I haven’t made my larger bib pattern into a binky bib yet, so what I would do is print the binky bib template and the regular bib template from my other bib tutorial. Trace the bottom of the binky bib to the bottom of the regular bib to create the tab. Does that make sense?
Do you mail temple’s for the Binkley bib.? I would love to have one . I’m a hand and on person. If you mail them what do they cost?
Kathy, are you unable to print the template at home?
I downloaded and cut out the pattern for the bib. It is very tiny and too small for a baby. Is the pattern the correct size or do you need to make it bigger
No, it is the correct size. Perhaps the way it was printed made it too small. Enlarge it if you need to.
Can I make this bib and sell at craft shows?
Yes you can. Thank you for asking!
Thank you so much for a wonderful pattern. I made some for our grandson and his parents love them. It forced me to become familiar with my new digital machine which was a bonus. My only problem was with the babyville snaps which kept me up at night. I am a fanatic about reading reviews but just went ahead and ordered them. Sometimes they worked; more often not, and the only way I could remove them was with my teeth. My poor dearmother must be turning in her grave. I went back to the reviews which were really good but some people had the same experience. I just got the Kam set and they work like a charm. Thanks again for your generosity.
I always squeeze the snaps down half way, then all the way to keep them from breaking. I don’t know why that works, but it does. When I have to remove them I use a set of channel locks to squeeze them in half. They can be a pain!
Hi! Thank you so much for the pattern. It has worked very well for me! I am wondering how you reconmend washing these once they are made? I washed one in cold water and dried in dryer on low and it shrunk. I used flannel and terry cloth. Thank you in advance!
Chrissy, my fabrics are always prewashed for bibs because the two different materials do not shrink evenly. Try that out and it should help.
I made one and it seemed to have shrunk and the binki holder wasn’t really a square it was more a rounded edge I did wash it before any suggestions?
I always prewash my fabrics beforehand and dry the chenille on high to make sure it has shrunk properly. You may find that you need to iron the bib after washing, but most of the shrinking should take place in the prewash.
I love this pattern wish i had it when my babies were small but i will make some for other friends with new ones thanks holly
Hi, what width & length is the tab for the binky please
Hi,
I really like the idea of the binky bibs. We have 3 greatgrandbabies arriving between now & Dec. Really want to make some for
each of the Moms.
What do you advise about whether to fleece underneath? Or does it need to be cotton?
Thank you so much.
One shower is next Sat. so hope I’ll hear from you soon, if you have time.
Thank you so much!
The other day I left a question about is fleece OK for the backing of this bib?
I didn’t get an answer & now it’s gone????
Comments have to be approved before posting to the site. Fleece should be fine for the back of a bib, if that’s what you want to use.
Just printed the pattern for the Binkie Bib. I have a niece that will be having twins in November. Plenty of time for me to make the bibs. I tried to get into your Etsy shop to look for the pincushion but all I got was the shop does not exist….how weird since I copied and pasted the link. Any other place I can look for your pattern. I love the size of it and I think it would be super easy to make.
Thank you. First Grandchild on the way. I love sewing and this is something that will definitely be made with Love.
Do you ever use terry for the backing? If so do you use a liner?
You wouldn’t need a liner for thicker backing, like terry, chenille, or minky.